How To Hold A Kendama
What’s up, how’s it going everyone. I’m going to teach you about the different grips in kendama. Now there are a few different variations of each grip so I’m going to teach you each one so how to hold a kendama for all these tutorials.
Ken Grip
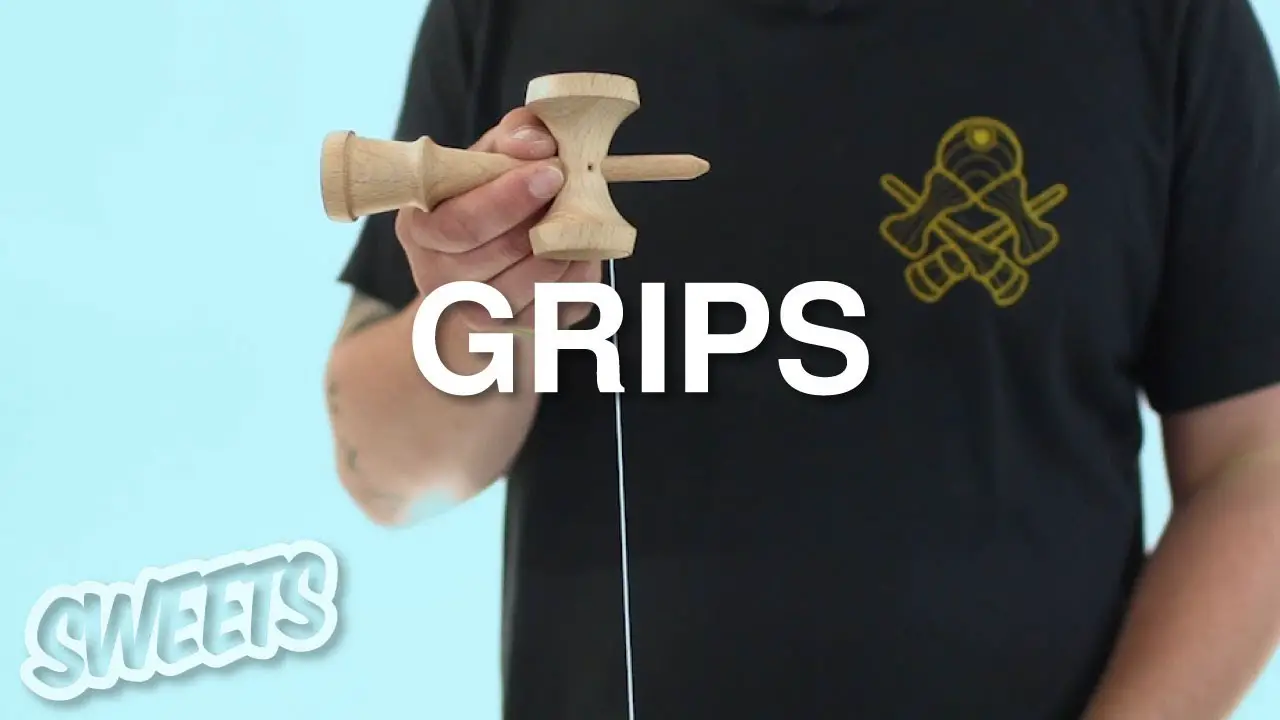
So let’s start with the first one we always need to learn, Ken grip. Ken grip is probably the most basic grip that you’re going to be using the most out of any of the grips in kendama.
So for Ken grip what we want to do is make sure that we’re holding it with our thumb and our pointer finger directly underneath the sarado. We have our other fingers kind of just falling in line hanging out right underneath the pointer finger.
So when you’re holding it you have a lot of nice balance from your fingers underneath when you go to do a little cup and bottom cup your fingers are all supposed to really kind of stay in that same generic place.
So thumb underneath the cup, sometimes you hold it lower , but for the most part Ken grip. Thumb and pointer finger underneath the cups.
Sara Grip
Next one Sara grip. Sara grip is more of a traditional Japanese style hold. We still use it in competitions and we still use it in different type of events so make sure that you practice the Sara grip.
What you’re going to do is pretend like you’re holding the kendama like you write with a pencil. You’re going to take your thumb and you’re going to put it right underneath the big cup. You take your pointer finger and you’re going to put it right underneath the the bottom of the Ken.
Nice and snug underneath the sarado just like you did before, the Ken grip. Now this grip is used a lot in moshikame. We will teach you that in future posts, but Sara grip is a very traditional grip.
If you need you can take your two fingers your ring and your middle finger and you can put them in the small cup. In Japan some kids start like this because moshikame is one of the first things you practice and you don’t use that little cup very much, so putting your fingers in that cup can help you with moshikame if you like.
Tama Grip
All right the next grip, one of my favorite grips, is the Tama grip. In kendama one of the coolest parts is after you’re done with the Ken grip you can change it up practice the Tama grip.
You want to make sure that your pointer finger and your thumb are on each side of the hole perfectly. Your brain wants to know that that hole is right in the middle of your two fingers so when you go to do an airplane you know to land it perfectly in between those two fingers.
So I always tell people make a “C” with your right hand and go right on the side of the Tama. You can put one, two, three, four fingers on the Tama.
You kind of just got to figure out what feels best for you but the key is to make sure that you got your pointer finger and your thumb on each side of that hole perfectly.
Candlestick Grip
Okay the last grip I’m going to teach you we use in games, we use in some beginner ladders, but it’s something you’re still going to need to know. That is candlestick grip.
I actually used this trick a lot in the most recent competition I was at. So, for candlestick grip you want to take your pointer, your middle and your thumb, and put them right underneath the sarado.
This is the candlestick grip. You can’t grab the cup on either side, you got to just grab the candlestick. Now this trick is a lot like spike but the candlestick grip is held a different way.
When you go to pull it up, nice straight and easy you got your candlestick grip. We don’t use it for much else but it’s a grip that you’re going to need it on the future so we wanted to make sure to teach you.
If you have any other questions about what kind of grips or other techniques to do in kendama make sure you comment and ask us some questions.
Read More: How to Goon Circle Kendama
[…] Read More: How to Hold A kendama […]
[…] This trick is called Lighthouse. And in this trick all you’re doing is you are holding the kendama is a Tama Grip and balancing the ken on top. And to start we are going to practice it in a few different steps. The first one is to get in your Tama Grip, you can learn about that in How to Hold the Kendama. […]
[…] This trick is called Down Spike. Now to do this trick you’re going to start off holding the kendama in the sara grip. If you don’t know that go read our post on how to hold the kendama. […]
[…] In this post we are going to be learning the trick known as Flip Flop. In order to do this trick, you are going to start off by holding in a modified ken grip. To learn this grip check out How To Hold A Kendama. […]
[…] going to hold the Ken in Ken grip. If you don’t know about kendama grips check out how to hold a kendama. That’s where you take your fingers and you have hold it right here right up underneath the […]
[…] just like the Big Cup we’re going to start by learning how to hold a kendama. Specifically in Sara Grip, only this time you’re going to turn your hand over so that the […]
[…] Read More: How To Hold a Kendama […]
[…] you don’t what that is watch our other post on How to Hold the Kendama. For now, get the Sara Grip, have the big cup pointing upward and you are going to catch the tama […]
[…] what you want to do to start off this trick. Is you want to have it in Tama Grip and you’re going to hold the cane with your other hand, so if your left you’re going to hold it […]
[…] begin, let’s learn the proper grip for the C Whip trick. Start by holding the kendama upside down with four fingers. Your hand should […]